
Jennie O Turkey Cooking Instructions: A Comprehensive Guide
Navigating the world of turkey cooking can be daunting, but with Jennie-O, a delicious and stress-free holiday feast is within reach. This comprehensive guide provides easy-to-follow instructions, tips, and insights to help you cook a perfect Jennie-O turkey, ensuring a flavorful, tender and juicy centerpiece for your gathering.
Preparation: Removing Packaging and Giblets
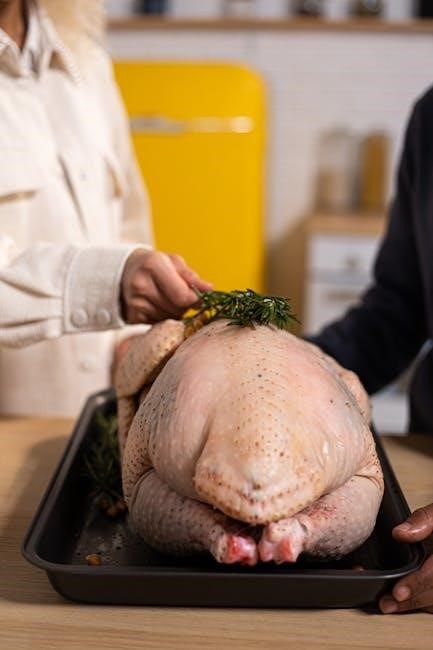
Before you even think about preheating your oven, the first crucial step in preparing your Jennie-O turkey is to carefully remove all packaging. This includes any outer plastic wrap, netting, or foam trays. Ensure no plastic remains as it will melt in the oven. Next, locate the neck and giblet package, typically found inside the turkey cavity.
These parts are often wrapped in paper or plastic, so remove this packaging carefully, making sure not to leave any paper behind. The giblets usually consist of the liver, heart, and gizzard. You can use these to create a flavorful gravy later on. Some turkeys may also include a gravy packet, be sure to remove that as well. Rinse the turkey inside and out with cold water. Pat it dry with paper towels before proceeding to the next step. This helps with browning and removes any lingering ice crystals.
Preheating the Oven: Optimal Temperature Settings
Once the turkey is prepped, it’s time to focus on the oven. Preheating is crucial for even cooking and achieving that perfect golden-brown skin. The recommended oven temperature for cooking a Jennie-O turkey is 325°F (163°C). This temperature strikes a balance between cooking the turkey thoroughly and preventing it from drying out too quickly.
Ensure your oven is properly calibrated. Using an oven thermometer to verify the internal temperature is a great idea. Give your oven ample time to preheat fully. This usually takes around 15-20 minutes, but it can vary depending on your oven model. Placing the turkey in a cold oven can lead to uneven cooking and unpredictable results. A properly preheated oven ensures that the turkey cooks evenly and reaches a safe internal temperature in a reasonable amount of time. For cooking a Jennie O oven-roasted turkey breast it is recommended approximately 350F (175C).
Recommended Cooking Time: Minutes Per Pound at 325F
Determining the correct cooking time is essential for a perfectly cooked Jennie-O turkey. While various factors can influence the final time, a general guideline is to roast the turkey at 325°F (163°C) for a specific number of minutes per pound. A general rule of thumb is 13 to 16 minutes per pound at 350F (175C). This is the optimal temperature for ensuring even cooking and juicy results.
For an unstuffed turkey, estimate approximately 13 minutes per pound. If you’re cooking a stuffed turkey, increase the cooking time to around 15-16 minutes per pound. Remember that these are estimates, and the actual cooking time may vary depending on the turkey’s size, the accuracy of your oven, and whether you choose to cover the turkey during roasting. Always use a meat thermometer to verify doneness. For example, for a turkey that weight 2.688 kg (kilograms) 5.926 lb (pounds) 2688 grams cooking time is 2 hours.
Using a Meat Thermometer: Achieving Safe Internal Temperature
A meat thermometer is your best friend when cooking a Jennie-O turkey, ensuring both safety and optimal doneness. Forget guesswork; rely on precise temperature readings to achieve a juicy and perfectly cooked bird. Insert the meat thermometer into the thickest part of the thigh, without touching the bone. The turkey is done when the meat thermometer reaches 165F in the thickest part of the breast and 180F in the thickest part of the thigh.
The thigh should register 180°F (82°C) to ensure the dark meat is fully cooked. For the breast, aim for 165°F (74°C). These temperatures guarantee that the turkey is safe to eat and has reached the desired level of tenderness. Remember that the turkey’s temperature will continue to rise slightly even after it’s removed from the oven, so it’s best to take it out when it’s within a few degrees of the target temperature. A thermometer is the key to success.
Placement in the Oven: Rack and Pan Considerations
Proper placement in the oven is crucial for even cooking of your Jennie-O turkey. Use a roasting pan with a rack to elevate the turkey, allowing hot air to circulate around the bird for consistent cooking. The rack also prevents the turkey from sitting directly in the pan drippings, which can lead to a soggy bottom. A shallow roasting pan is ideal, as it promotes better browning.
Position the oven rack in the lower third of the oven, ensuring the turkey has enough space to cook without touching the top heating element. This placement helps prevent the breast from overcooking before the rest of the turkey is done. A rack is the key to your success. A good roasting pan will promote great browning.
To Foil or Not to Foil: Covering the Turkey During Roasting
The decision to cover your Jennie-O turkey with foil during roasting depends on your desired outcome. Covering the turkey with foil helps retain moisture, preventing the breast from drying out, especially during the initial stages of cooking. However, foil can hinder browning, resulting in paler skin.
For a golden-brown, crispy skin, remove the foil during the last hour of cooking. This allows the skin to reach the desired color and texture. If the turkey starts to brown too quickly, you can loosely tent it with foil again to prevent burning. Monitor the color of the skin closely and adjust the foil accordingly to achieve the perfect balance of moisture and browning. Foil is a great tool to use when you need a balance of moisture and browning. Keep an eye on the oven so nothing burns.
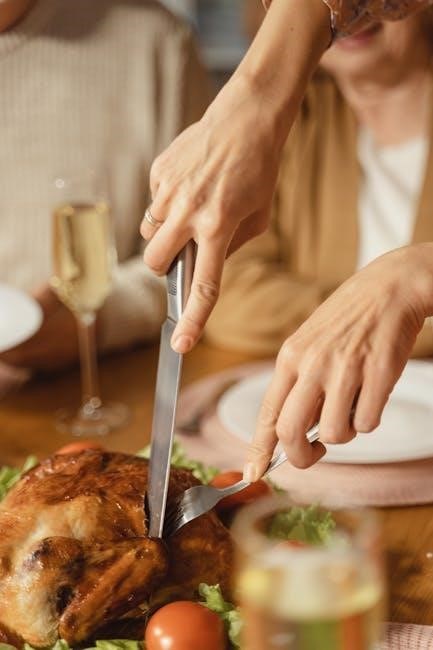
Resting Period: Importance Before Carving
The resting period after roasting your Jennie-O turkey is a crucial step often overlooked, yet it significantly impacts the final result. Allowing the turkey to rest before carving ensures a more succulent and flavorful bird. During cooking, the juices within the turkey are forced towards the center.
Resting allows these juices to redistribute evenly throughout the meat, resulting in a moister and more tender texture. Without resting, carving immediately after roasting will cause a significant amount of juice to run out, leaving you with a drier turkey. Aim for a resting period of at least 15-20 minutes, loosely tenting the turkey with foil to keep it warm. This resting time allows the meat fibers to relax, making carving easier and more efficient. Be patient; the wait is worth the reward of a perfectly juicy turkey.
Cooking from Frozen: Oven Ready Turkey Instructions
For those pressed for time or who forgot to thaw their turkey, Jennie-O Oven Ready turkeys are a lifesaver! These turkeys are specifically designed to be cooked directly from frozen, eliminating the need for days of thawing. The key is to follow the instructions precisely for optimal results.
Begin by preheating your oven to the temperature specified on the packaging, typically 325°F (163°C). Remove the Oven Ready turkey from its outer packaging, but do not remove the oven-safe bag surrounding the turkey. Place the bagged turkey in a roasting pan and follow the cooking time guidelines provided on the packaging, which will vary depending on the turkey’s weight. The bag will vent during cooking. Use a meat thermometer to ensure the turkey reaches a safe internal temperature of 165°F (74°C) in the thickest part of the thigh and breast. Once cooked, let the turkey rest in the bag for the recommended time before carving.
Cooking Turkey Breast Separately: Time and Temperature
Cooking a turkey breast separately is a fantastic option for smaller gatherings or when you prefer white meat. Jennie-O offers various turkey breast options, and understanding the proper cooking time and temperature is crucial for achieving a moist and flavorful result. Preheat your oven to 325°F (163°C). This temperature ensures even cooking and helps prevent the breast from drying out.
Place the turkey breast on a roasting rack in a shallow pan. This allows air to circulate around the breast, promoting even cooking. The cooking time will depend on the size of the breast, but a general guideline is 13-16 minutes per pound. Use a meat thermometer to monitor the internal temperature. Insert the thermometer into the thickest part of the breast, avoiding the bone. The turkey breast is done when it reaches an internal temperature of 165°F (74°C). Let the breast rest for at least 15 minutes before carving to allow the juices to redistribute, resulting in a more tender and flavorful meat.
Jennie-O Hotline: Expert Assistance for Cooking Queries
Cooking a turkey, especially for a special occasion, can bring up a lot of questions. Thankfully, Jennie-O provides a valuable resource for home cooks: the Jennie-O Turkey Hotline. This hotline is staffed by expert professionals ready to assist with any turkey-related cooking queries you might have, ensuring your turkey turns out perfectly. The Jennie-O hotline operates seasonally, typically around Thanksgiving and other major holidays.
You can reach the hotline by calling 1-800-TURKEYS, and trained experts will be available to answer your questions about everything from thawing and preparation to cooking times and temperatures. They can also provide guidance on carving, troubleshooting cooking issues, and even offer creative recipe ideas for leftover turkey. Whether you’re a seasoned cook or a first-timer, the Jennie-O Turkey Hotline is a fantastic resource to have on hand for a stress-free and successful turkey cooking experience. Don’t hesitate to call and take advantage of their expert advice!