
A seam guide is a tool on sewing machines that helps sew straight lines and maintain consistent seam allowances. Located on the needle plate, it guides fabric alignment for precise stitching. Available as built-in, magnetic, or aftermarket accessories, it enhances sewing accuracy. Tips include using measuring tapes or chalk for temporary alignment aids, ensuring professional results.
1.1 What is a Seam Guide?
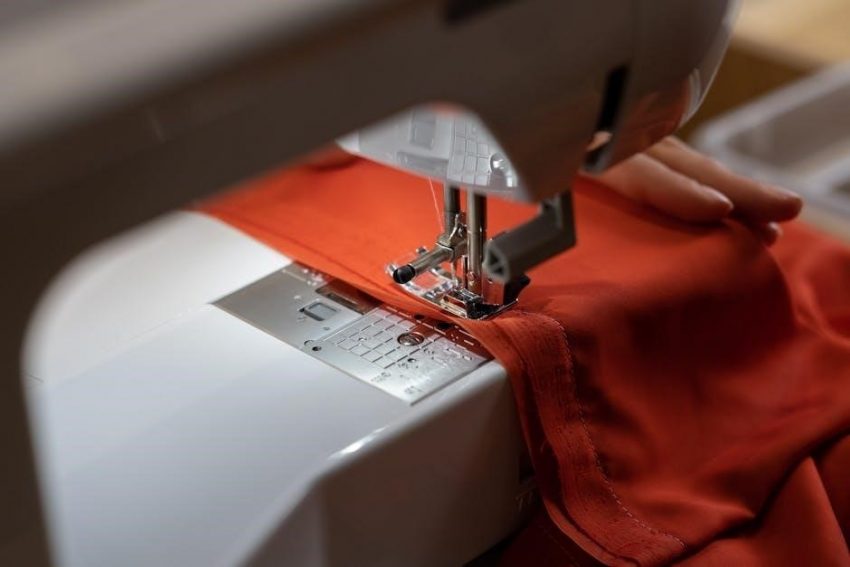
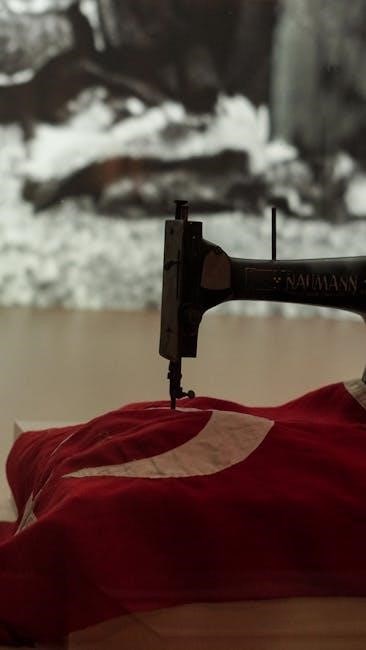
A seam guide is a tool or feature on a sewing machine designed to help sewists achieve straight, consistent seams. It is typically located on the needle plate or throat plate of the machine. The guide provides a reference edge for aligning fabric, ensuring accurate stitching. Available in forms like built-in markings, magnetic attachments, or adhesive strips, it helps maintain uniform seam allowances. This accessory is especially useful for beginners and professionals alike, promoting precision and efficiency in sewing projects. By guiding fabric movement, it simplifies tasks such as straight-line sewing, topstitching, and navigating multiple fabric layers.
1.2 Importance of Using a Seam Guide
Using a seam guide is essential for achieving consistency and accuracy in sewing. It helps maintain straight seams and uniform allowances, which are critical for professional-looking results. The guide reduces errors and saves time by eliminating the need for constant adjustments. It is particularly useful for beginners, as it simplifies fabric alignment and promotes confidence. For experienced sewists, it enhances precision and efficiency, especially when working with delicate or multiple fabric layers. By ensuring consistent stitching, the seam guide contributes to durable and visually appealing seams, making it an indispensable tool for any sewing project.
1.3 Brief History of Seam Guides in Sewing Machines
The concept of seam guides dates back to the early days of sewing machines. Initially, sewists relied on markings on the needle plate or manual measurements. As sewing machines evolved, built-in seam guides became a standard feature, offering improved accuracy. Over time, manufacturers introduced adjustable guides to accommodate various seam allowances. The development of magnetic and adhesive seam guides further expanded their versatility. Today, modern sewing machines often include advanced seam guides, while aftermarket accessories provide additional customization options. This evolution reflects the growing demand for precision and efficiency in sewing, making seam guides an essential tool for both beginners and professionals.
Benefits of Using a Seam Guide
A seam guide ensures straight seams, maintains consistent allowances, enhances precision, and saves time. It reduces errors, making sewing more efficient and professional, especially for beginners.
2.1 Ensuring Straight Seams
The seam guide is essential for sewing straight lines, as it provides a clear visual marker to align fabric edges. By keeping the fabric edge against the guide, sewists can maintain consistent alignment, resulting in professional-looking seams. Magnetic or adhesive seam guides are particularly useful for this purpose, as they securely attach to the machine and offer a steady reference point. For beginners, using a seam guide helps develop the skill of guiding fabric smoothly without deviation. It’s especially helpful for topstitching and sewing straight hems, ensuring accuracy and reducing the need for costly retries or adjustments.
2.2 Maintaining Consistent Seam Allowance
Maintaining a consistent seam allowance is crucial for professional sewing results, and the seam guide simplifies this process. By aligning the fabric edge with the guide, sewists can ensure uniform spacing between the stitch line and fabric edge. This consistency is especially important when working on garments or home decor projects, where uneven seams can affect the final fit or appearance. The seam guide acts as a reliable reference, preventing deviations and saving time. Magnetic or adhesive guides are particularly handy, as they can be adjusted to different seam allowances, ensuring accuracy across various fabrics and projects.
2.3 Saving Time and Reducing Errors
The seam guide significantly streamlines the sewing process by minimizing the need for constant adjustments and realignments. By ensuring fabric stays aligned, it reduces errors such as uneven stitching or misaligned seams. This tool is especially useful for beginners, as it helps avoid costly mistakes. Professionals also benefit, as it saves time during large-scale projects. The guide eliminates the need for frequent measuring or repositioning, allowing for smoother workflow. Over time, using a seam guide becomes second nature, making sewing more efficient and enjoyable. It’s a simple yet impactful feature that enhances both accuracy and productivity.
2.4 Enhancing Precision in Sewing
The seam guide elevates sewing precision by providing a clear, consistent reference point for fabric alignment. This ensures that each stitch is placed accurately, especially when working with delicate or patterned fabrics. The guide helps maintain uniformity in seam allowances, which is crucial for professional-looking results. It also supports precise topstitching and straight-line sewing, making intricate designs and tailored finishes achievable. By minimizing human error, the seam guide allows sewists to focus on creativity and technique, delivering high-quality outcomes consistently.
Types of Seam Guides Available
Seam guides come in various forms, including built-in machine guides, magnetic attachments, adhesive strips, and aftermarket accessories, each offering unique convenience and customization for precise fabric alignment.
3.1 Built-In Seam Guide on Sewing Machines
Built-in seam guides are integrated features on sewing machines, often located on the needle plate or throat plate. These guides provide markings to help sewists maintain consistent seam allowances and straight lines. They are convenient as they come with the machine and require no additional setup. Many modern machines offer adjustable built-in guides, allowing users to customize the width of their seams. These guides are especially useful for beginners, as they simplify the process of aligning fabric accurately. Over time, built-in seam guides have become a standard feature in most sewing machines, enhancing sewing precision and efficiency for all skill levels.
3.2 Magnetic Seam Guides
Magnetic seam guides are versatile tools that attach to the sewing machine’s needle plate using a strong magnet. They are ideal for maintaining consistent seam allowances and sewing straight lines. Unlike built-in guides, magnetic seam guides are adjustable, allowing users to customize the width of their seams. They are particularly popular among quilters and sewists who work with thick fabrics, as they provide a clear visual reference. Magnetic guides are easy to install and remove, making them a practical accessory for various sewing projects. Their portability and adaptability make them a favorite among sewists who own multiple machines or work on different models.
3.3 Adhesive Seam Guide Strips
Adhesive seam guide strips are reusable vinyl strips with a gentle adhesive backing that can be placed on the sewing machine’s needle plate. They provide a temporary guide for maintaining consistent seam allowances and sewing straight lines. These strips are especially useful for sewists who prefer not to make permanent changes to their machine. They work well with rulers or measuring tapes for added precision. Adhesive guides are easy to reposition and remove without leaving residue, making them ideal for projects requiring frequent adjustments. They are a practical solution for achieving professional results without investing in permanent modifications or additional accessories.
3.4 Aftermarket Seam Guide Accessories
Aftermarket seam guide accessories are optional, third-party products designed to enhance sewing precision. Made from materials like stainless steel or durable plastic, they offer longevity and versatility. These guides can be attached to various sewing machines, providing clear markings for consistent seam allowances. They often feature adjustable measurements and can be customized to suit different fabric types. Magnetic guides are particularly popular for their ease of use and strong grip. For those new to sewing, starting with an aftermarket guide can improve accuracy. These accessories are easy to install and remove, making them ideal for sewists who want to enhance their machine’s functionality without permanent modifications.
How to Use a Seam Guide Effectively
Align fabric edges with the seam guide for straight stitching. Adjust the guide for different seam allowances and fabric types. Use it to maintain consistent seams and precision, ensuring professional results every time. A helpful tip is to hand-guide the first stitch for precise needle placement, especially for beginners.
4.1 Locating the Seam Guide on Your Machine
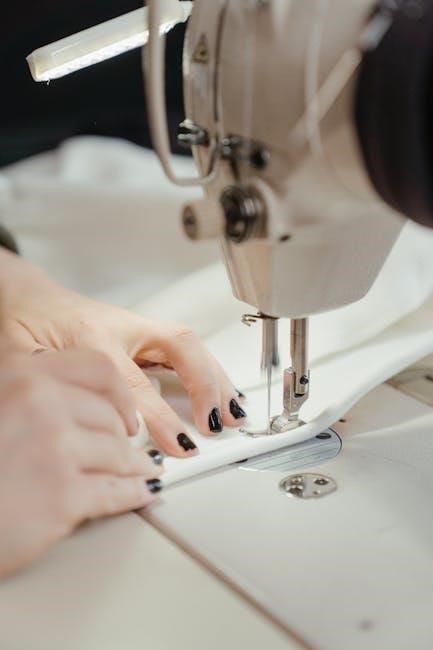
The seam guide is typically located on the needle plate of your sewing machine, often marked with measurement lines or notches. It may vary in design depending on the machine model. For built-in guides, look for etched markings or raised edges. Magnetic or adhesive guides can be attached near the needle plate. If your machine lacks a built-in guide, consider using aftermarket accessories. Always refer to your machine’s manual for specific locations, as some models may have adjustable or detachable seam guides. Once located, align your fabric edge with the guide to ensure straight stitching and consistent seam allowances.
4.2 Adjusting the Seam Guide for Different Fabrics
Adjusting the seam guide ensures proper alignment for various fabrics. For thicker materials like denim, move the guide slightly outward to accommodate the fabric’s bulk. For delicate fabrics, position it closer to the needle to prevent dragging. Magnetic or adhesive guides can be repositioned easily, while built-in guides may require adjusting the needle plate or using additional aids like measuring tapes. Always test the alignment on scrap fabric before sewing to ensure smooth feeding and consistent results. Proper adjustment prevents puckering or misalignment, ensuring professional-looking seams regardless of fabric type or weight.
4.3 Sewing Straight Lines with the Seam Guide
To sew straight lines, align the fabric edge with the seam guide, ensuring it runs parallel to the guide’s markings. Maintain steady fabric movement, keeping the edge flush against the guide. For consistent results, use a slow, steady pace, especially when navigating corners or layers. Magnetic or adhesive guides can be particularly helpful for maintaining alignment. If needed, mark the fabric with chalk beforehand to complement the guide. This technique ensures straight, professional seams and minimizes the risk of deviations, making it ideal for beginners and experienced sewists alike. Proper alignment and steady movement are key to achieving flawless straight lines.
4.4 Navigating Fabric Layers Using the Seam Guide
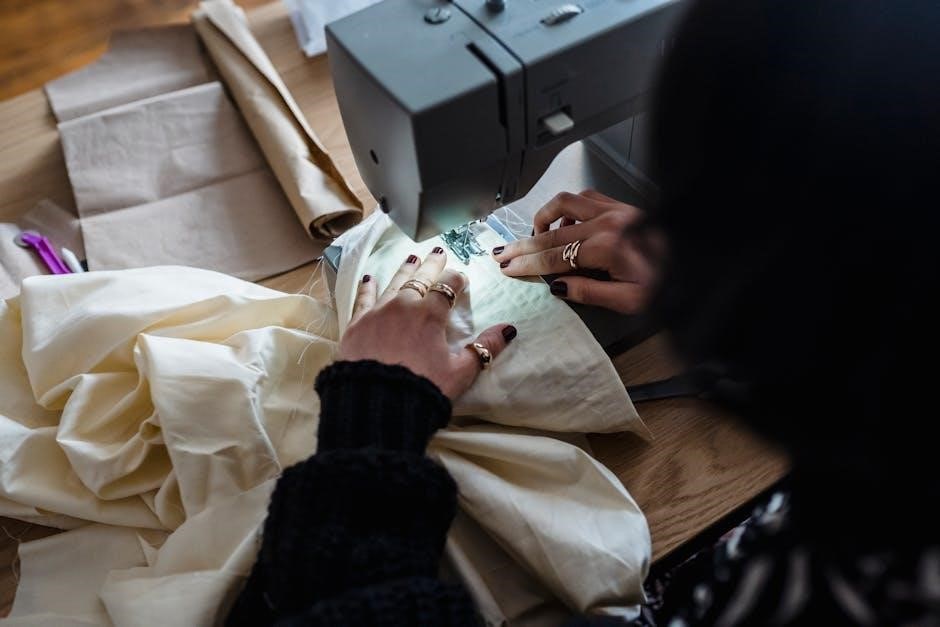
Navigating fabric layers with a seam guide ensures smooth and even stitching. Begin by aligning the edge of the fabric with the guide, maintaining consistent pressure. For multiple layers, stack fabrics neatly and ensure edges are flush. Use the guide to keep layers aligned as you sew. If fabric shifts, pause and adjust before continuing. Magnetic or adhesive guides are particularly helpful for managing layers, as they hold the fabric in place. For thick fabrics, consider slowing your sewing speed to maintain control. This technique prevents bunching and ensures precise stitching across all layers, resulting in professional-looking seams and finishes.
Customizing Your Seam Guide
Customize your seam guide by creating homemade versions or using measuring tapes and chalk for temporary alignments. This ensures personalized precision for various sewing projects and fabric types.
5.1 Creating a Homemade Seam Guide
A homemade seam guide can be made using simple materials like a ruler, marker, or adhesive tape. Draw a straight line on your sewing machine’s needle plate using a ruler and permanent marker for a quick guide. Alternatively, place a straightedge or a piece of adhesive tape along the desired seam allowance. This method is cost-effective and easy to customize. For temporary use, chalk or removable vinyl strips can also serve as guides. While homemade guides are convenient, they may lack the durability of store-bought options. However, they are perfect for occasional projects or as a backup solution.
5.2 Using Measuring Tapes as Temporary Guides
Using a measuring tape as a temporary seam guide is a practical solution for maintaining straight lines. Place the tape alongside the fabric, aligning it with the edge of the material or the desired seam allowance. Secure it with a small piece of adhesive tape to keep it in place. This method is especially useful for projects where a permanent guide isn’t feasible. The tape can be easily adjusted or removed, making it ideal for one-time use or for sewing different fabric types. It ensures accuracy without the need for additional tools, providing a flexible alternative to built-in or magnetic guides.
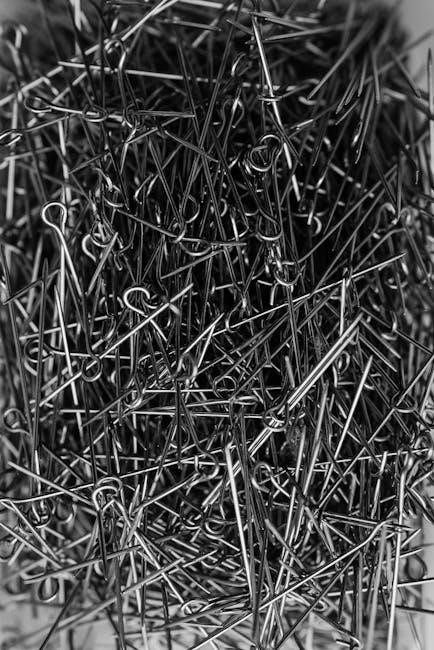
5.3 Marking Fabric with Chalk or Pins
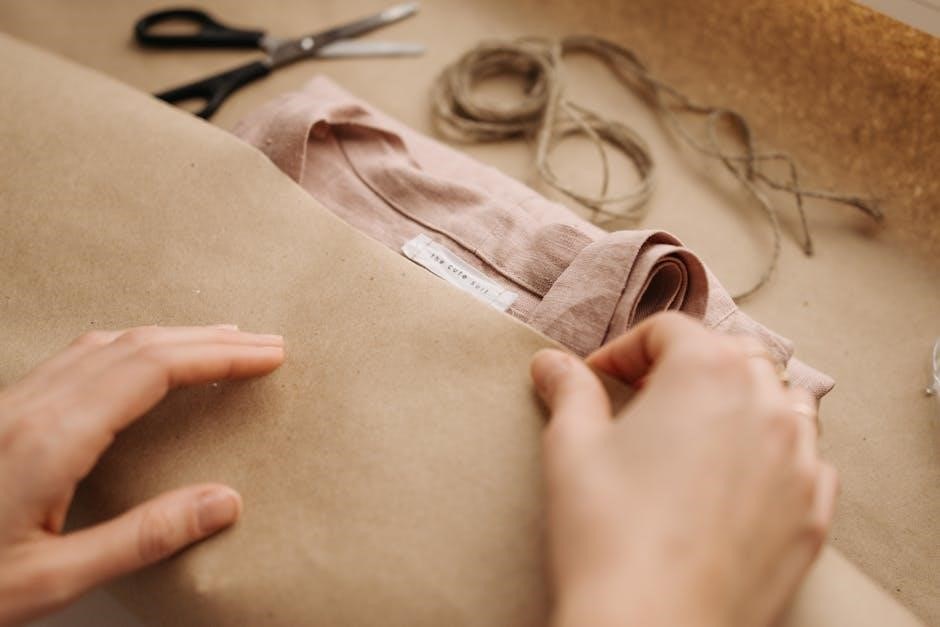
Marking fabric with chalk or pins is a simple yet effective way to create temporary guides for sewing. Use chalk to draw lines directly on the fabric, following the desired seam allowance or pattern markings. For precision, align the fabric edge with the chalk line while sewing. Pins can also be used to mark specific points or edges, creating a visible guide for straight stitching. This method is particularly useful for custom projects or unique fabrics where standard guides aren’t suitable. Chalk marks are easily removable, and pins can be adjusted as needed, making this a versatile and temporary customization option for seam guiding.
Maintenance and Care of the Seam Guide

Regularly clean the seam guide to prevent dust buildup. Store it in a dry place to avoid rust or damage. Replace worn-out guides promptly for optimal performance.
6.1 Cleaning the Seam Guide
To maintain your seam guide’s effectiveness, regular cleaning is essential. Start by turning off and unplugging your sewing machine for safety. Remove any fabric or threads to access the seam guide fully. Use a soft brush to gently sweep away lint and dust. Dampen a clean cloth with distilled water and wipe the seam guide, avoiding excessive moisture. For stubborn residue, a cotton swab lightly dampened can be used. Allow the area to dry thoroughly with a clean cloth. Finally, test the seam guide with scrap fabric to ensure accuracy and even stitching.
6.2 Storing the Seam Guide Properly
Proper storage of your seam guide is crucial to maintain its accuracy and longevity. After cleaning, ensure the seam guide is completely dry to prevent rust or corrosion. Store it in a protective case or cover to shield it from dust and debris. For built-in seam guides, simply keep your sewing machine covered when not in use. Magnetic or adhesive guides should be stored separately in a dry place, away from direct sunlight or extreme temperatures. Avoid stacking heavy objects near the storage area to prevent accidental damage. Regular checks ensure your seam guide remains in prime condition for precise sewing.
6.3 Replacing Worn-Out Seam Guides
Replacing a worn-out seam guide ensures continued accuracy in your sewing projects. Start by inspecting the guide for signs of wear, such as scratches, misalignment, or damage. If damaged, purchase a replacement from the machine’s manufacturer or aftermarket suppliers. Before installation, clean the area thoroughly to ensure proper adhesion or fitting. Follow the manufacturer’s instructions for installation, especially for magnetic or adhesive guides. Once replaced, test the guide with a scrap fabric to ensure it aligns correctly. Properly dispose of the old guide, recycling if possible. Regular replacement maintains your machine’s performance and prevents sewing errors.
Troubleshooting Common Issues
Common issues with seam guides include misalignment, fabric sticking, or damage. Check for proper installation, clean the guide, and ensure fabric moves smoothly. Replace if damaged for optimal performance.
7.1 Seam Guide Not Aligning Properly
If your seam guide isn’t aligning properly, check for improper installation or incorrect setup. Ensure the guide is securely attached and calibrated to your machine. Fabric type and thickness can also affect alignment; adjust settings accordingly. Clean the guide and needle plate regularly to prevent debris interference. For temporary fixes, use measuring tapes or chalk to mark straight lines. If issues persist, consult your machine’s manual or consider replacing the guide. Proper alignment is crucial for accurate stitching, so addressing this promptly ensures professional-quality results.
7.2 Fabric Not Moving Smoothly Along the Guide
Fabric not moving smoothly along the seam guide can result from improper alignment, incorrect tension, or fabric type. Ensure the guide is clean and free from debris, as dust or residue can interfere with fabric movement. For slippery fabrics, use a Teflon foot or adjust the presser foot pressure; Thicker fabrics may require raising the guide slightly or using a walking foot for better control. Always pre-test fabric movement before sewing to identify and resolve issues. Properly securing the guide and maintaining consistent machine settings will help achieve smooth fabric flow and professional-quality stitching.
7.3 Seam Guide Damaged or Bent
If the seam guide is damaged or bent, it can disrupt fabric alignment and stitching accuracy. Inspect the guide regularly for signs of wear or misalignment. For minor bends, gently straighten the guide using a small tool or consult a professional. If damaged beyond repair, replace the guide with a compatible aftermarket accessory. Clean the area around the guide to ensure proper function. For temporary solutions, use a measuring tape or chalk to mark straight lines on the fabric. Always refer to the machine’s manual for specific guidance on repair or replacement. Regular maintenance ensures optimal performance and precise stitching results.
Advanced Techniques Using the Seam Guide
Explore advanced sewing techniques like curved stitching, precise topstitching, and combining the seam guide with specialized feet for intricate designs. Enhance your projects with professional-level accuracy and creativity.
8.1 Sewing Curved Lines with Precision
Sewing curved lines with precision requires a combination of the seam guide and careful fabric manipulation. Start by aligning the edge of the fabric with the guide, then gently steer the fabric while maintaining consistent pressure. For intricate curves, use steam to relax the fabric, allowing it to bend smoothly. Pairing the seam guide with a walking foot or Teflon foot can enhance control. Marking the fabric with chalk or pins beforehand helps maintain accuracy. Practice on scrap fabric to refine your technique, ensuring smooth transitions and even stitching. Mastering curved lines expands your sewing capabilities, enabling professional-looking results in garments and home decor.
8.2 Using the Seam Guide for Topstitching
Using the seam guide for topstitching ensures precise, evenly spaced decorative stitching. Align the fabric edge with the guide to maintain consistent distance from the seam. Magnetic seam guides are particularly useful, as they securely attach to the machine, allowing smooth fabric movement. For thicker fabrics, adjust the guide slightly outward to accommodate the bulk. Combine the seam guide with a topstitching needle or heavy-duty needle for optimal results. Keep the fabric steady and move it at a consistent speed to achieve professional-looking topstitching. This technique is ideal for enhancing garment edges, bags, and home decor projects with clean, visible stitching.
8.3 Combining Seam Guide with Other Sewing Feet
Combining the seam guide with specialized sewing feet enhances precision and versatility. For example, using the seam guide with a piping foot allows for accurate placement of piping along seams. Similarly, pairing it with a zipper foot ensures straight stitching while installing zippers. The edge-joining foot works seamlessly with the seam guide for perfect seams on delicate fabrics. Additionally, the walking foot can be used alongside the seam guide to manage thick or layered fabrics with ease. This combination enables advanced techniques, such as quilting or bag-making, ensuring professional results. Experimenting with different feet while using the seam guide expands your sewing capabilities significantly.
The seam guide is a valuable tool for achieving precision and efficiency in sewing. By mastering its use, sewists can ensure straight seams, consistent allowances, and professional results. Experiment with different guides to enhance your sewing experience and unlock new creative possibilities.
9.1 Summary of Key Points
The seam guide is a simple yet essential tool on sewing machines, designed to help sewists achieve straight seams and consistent allowances. It enhances precision, saves time, and reduces errors. Available in various forms—built-in, magnetic, or adhesive—it offers flexibility for different sewing needs. Proper use involves aligning fabric edges with the guide, adjusting for fabric thickness, and maintaining smooth movement. Customization options, like homemade guides or chalk markings, add versatility. Regular maintenance ensures longevity, while troubleshooting common issues like misalignment or fabric drag can be addressed with simple adjustments. Mastering the seam guide unlocks professional-grade results and expands creative possibilities.
9.2 Final Tips for Mastering the Seam Guide
Mastering the seam guide requires practice and patience. Start by aligning fabric edges carefully and sewing slowly for straight results. Use magnetic guides for easy adjustments and topstitching precision. Experiment with combining the seam guide and specialized feet for complex projects. Always test adjustments on scrap fabric before sewing final pieces. Regularly clean and maintain the guide to ensure accuracy. For challenging fabrics, consider handheld guiding techniques or temporary markings. Seek tutorials or professional advice for advanced techniques. Keep experimenting and adapting the guide to your sewing style for consistent, professional-grade outcomes. Remember, mastery comes with time and creative application of the seam guide.
Resources for Further Learning
- Explore YouTube tutorials on sewing machine techniques and seam guide usage.
- Visit sewing blogs for detailed guides and troubleshooting tips.
- Join online sewing communities for shared experiences and advice.
- Refer to manufacturer manuals for model-specific seam guide instructions.
10.1 Recommended Tutorials and Videos
For mastering the seam guide, YouTube offers excellent tutorials like “Sewing Machine Basics” and “Perfect Seams Every Time.” Channels such as Sewing With Sarah and Craftsy provide step-by-step guides. Videos like “How to Use Your Sewing Machine’s Seam Guide” and “Topstitching Made Easy” are highly recommended. Additionally, manufacturer-specific tutorials, like those from Singer and Juki, offer model-specific tips. Online platforms like Craftsy and Udemy also feature courses on sewing machine techniques. These resources cover topics from basic seam alignment to advanced methods like sewing curved lines and combining seam guides with other feet. Watching these can significantly improve your sewing skills and confidence.
10.2 Sewing Communities and Forums
Joining sewing communities and forums is an excellent way to connect with other sewists, share tips, and learn about seam guides. Popular platforms like Reddit’s r/sewing and QuiltingHub offer threads dedicated to sewing machine accessories. Websites like Sewing Parts Online and SewingMachinesPlus feature forums where users discuss their experiences with seam guides. Facebook groups such as Sewing Enthusiasts and Modern Sewing provide a space for asking questions and receiving advice. These communities often share tutorials, troubleshooting tips, and creative projects using seam guides, helping you maximize your sewing machine’s potential and improve your skills through peer-to-peer learning and support.
10.3 Manufacturer Guides and Manuals
Manufacturer guides and manuals are invaluable resources for understanding and using seam guides on sewing machines. Most brands, like Singer, Brother, and Juki, provide detailed manuals with their machines. These guides explain how to locate, adjust, and maintain the seam guide, ensuring optimal performance. Additionally, many manufacturers offer online tutorials, instructional videos, and downloadable PDFs; For instance, Singer’s free Owners Class videos and lessons via their app are tailored to help users master their machines. These resources often include troubleshooting tips and maintenance advice, making them essential for both beginners and experienced sewists to get the most out of their seam guides.